Prefabs
It is convenient to build a game object in the scene by adding components and setting their properties to the appropriate values. This can create problems, however, when you have an object like an NPC, prop or piece of scenery that is reused in the scene several times. Simply copying the object will certainly produce duplicates but they will all be independently editable. Generally, you want all instances of a particular object to have the same properties, so when you edit one object in the scene, you would prefer not to have to make the same edit repeatedly to all the copies.
Fortunately, Unity has a Prefab asset type that allows you to store a game object complete with components and properties. The prefab acts as a template from which you can create new object instances in the scene. Any edits made to a prefab asset are immediately reflected in all instances produced from it but you can also override components and settings for each instance individually.
Note: When you drag an asset file (eg, a Mesh) into the scene, it will create a new object instance and all such instances will change when the original asset is changed. However, although its behaviour is superficially similar, the asset is not a prefab, so you won’t be able to add components to it or make use of the other prefab features described below.
Check out the Unity Prefab Concept Video for details on the prefab usage.
Unity Prefab System
Using Runtime Prefabs
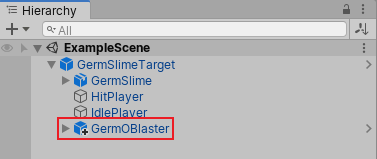
You can create a prefab by selecting Asset > Create Prefab and then dragging an object from the scene onto the “empty” prefab asset that appears. If you then drag a different game object onto the prefab you will be asked if you want to replace your current game object with the new one. Simply dragging the prefab asset from the project view to the scene view will then create instances of the prefab. Objects created as prefab instances will be shown in the hierarchy view in blue text. (Normal objects are shown in black text.)
As mentioned above changes to the prefab asset itself will be reflected in all instances but you can also modify individual instances separately. This is useful, say, when you want to create several similar NPCs but introduce variations to make them more realistic. To make it clear when a property has been overridden, it is shown in the inspector with its name label in boldface. (When a completely new component is added to a prefab instance, all of its properties will be shown in boldface.)
You can also create instances of prefabs at runtime from your scripts. See the Managed Runtime Support section for further details.
Editing Runtime Prefabs
The inspector for a prefab instance has three buttons not present for a normal object: Select, Revert and Apply.
The Select button selects the prefab asset from which the instance was generated. This allows you to edit the main prefab and thereby change all its instances. However, you can also save overridden values from an instance back to the originating prefab using the Apply button (modified transform position values are excluded for obvious reasons). This effectively lets you edit all instances (except those which override the value changed) via any single instance and is a very quick and convenient way to make global changes.
If you experiment with overriding properties but then decide you preferred the default values, you can use the Revert button to realign the instance with its prefab.
Babylon Prefab Layer

The prefab layer can prepare your objects to take advantage of the toolkit's deep cloning to instantiate game object prefabs at runtime. This step is required to use _ Unity Style Prefabs _ in a web browser environment. Web games cannot directly instaniate a prefab from disk, so game objects intended to be used as runtime prefabs must be present but disabled in the scene.
By setting game objects to the Babylon Prefab layer you will create disabled source meshes used for deep cloning when you call the scene manager instantiate prefab function.
Managed Runtime Support
The toolkit scene manager provides easy to use helper functions for client side prefab instantiation:
declare module BABYLON {class SceneManager {/** Checks the scene has the specified prefab mesh. */hasPrefabMesh(prefabName: string): boolean;/** Gets ths the raw prefab mesh from scene. */getPrefabMesh(prefabName: string): BABYLON.Mesh;/** Instantiates the specfied prefab object into scene. */instantiatePrefab(prefabName: string, cloneName: string, newPosition?: BABYLON.Vector3, newRotation?: BABYLON.Vector3, newScaling?: BABYLON.Vector3, newParent?: Node): BABYLON.Mesh;}}
Example Runtime Prefab script component:
module PROJECT {export class TestMeshComponent extends BABYLON.MeshComponent {public constructor(owner: BABYLON.AbstractMesh, scene: BABYLON.Scene, tick: boolean = true, propertyBag: any = {}) {super(owner, scene, tick, propertyBag);}protected start() :void {// Spawn player game objectvar player:BABYLON.Mesh = this.manager.instantiatePrefab("Player", "NewPlayer", BABYLON.Vector3.Zero());console.log("Echo Player: " + player.name);}}}